So you've purchased a digital art print and might be wondering what to do next. Don't worry, you're in the right place! Here’s a detailed step-by-step guide on how to make prints of your digital art into a physical print for your space.
Understanding the Basics
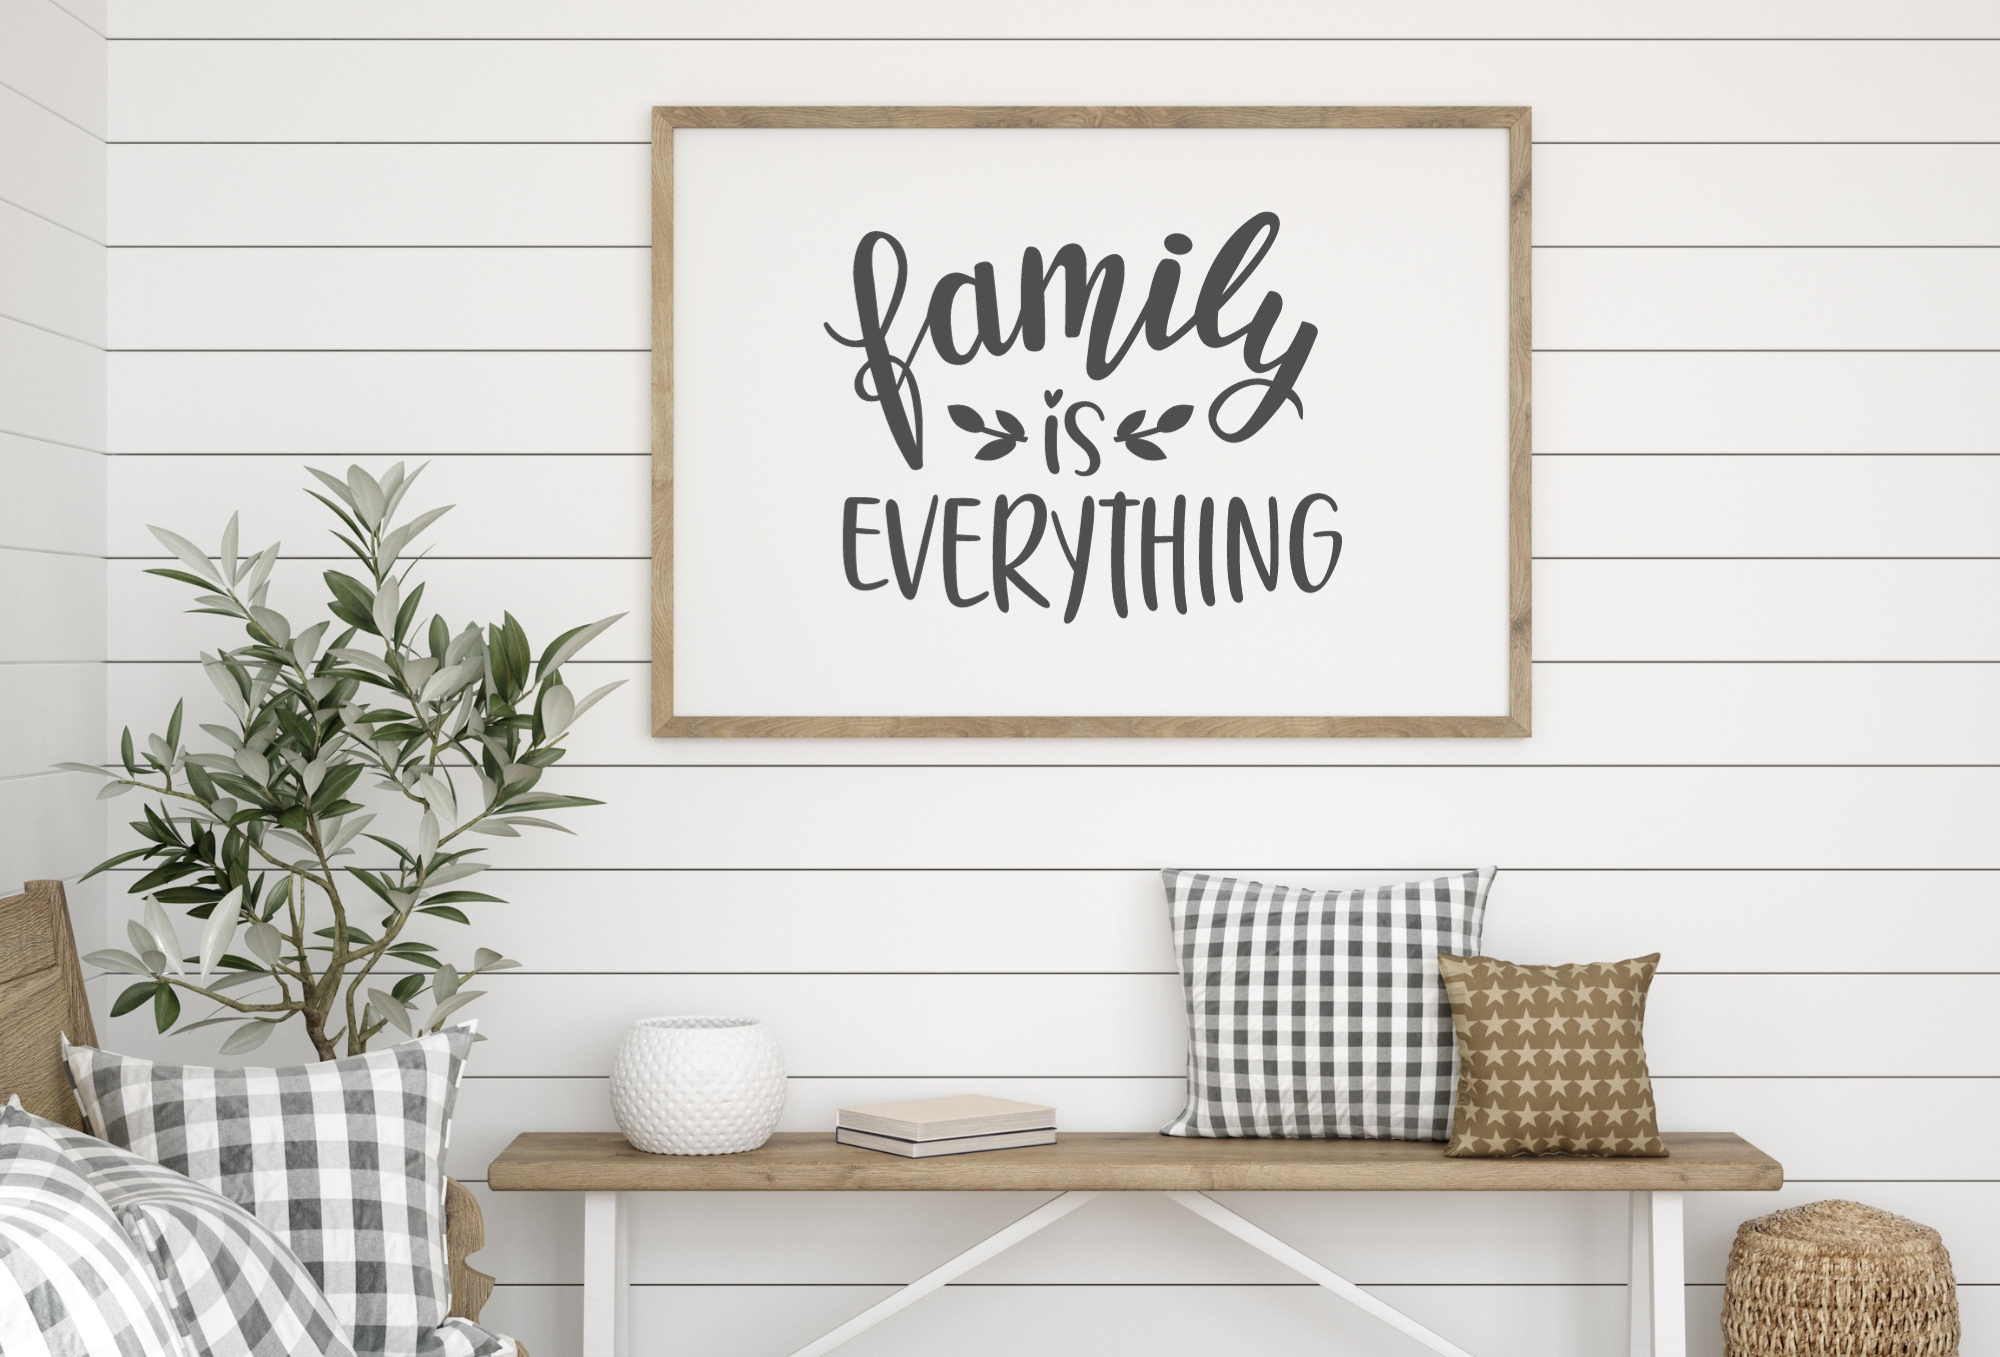
What is a Digital Wall Art Print?
A digital wall art file is essentially a digital version of an art piece. Instead of going to a physical store to buy artwork, you can get the image in a digital format, usually as a JPEG or PDF file. You can then print the image and frame it.
Why Choose Digital Artwork?
The beauty of printable artwork is that you have instant access to your art without having to wait for shipping. Your file is ready to download the moment you make your purchase. These prints are budget-friendly compared to physical art pieces, allowing you to customize your space. You can also easily switch up your wall decor by changing the frame’s print without having any extra artwork lying around.
How Do I Access My Digital Wall Art Purchase?
After purchasing your prints, you can immediately access the download link from the order confirmation page. You will also receive the download link via email (please check your junk or spam folders if you don't receive the email). The download links lead to a .zip folder with all the high-resolution (300 dpi) .JPEG images in the specified sizes for the print you purchased. Download and unzip the folder and choose the specific .JPEG size file that you need to print (see below for more instructions). Do not screenshot any images since it may result in lower resolution and a blurry print. You have unlimited access to your digital wall art and can download them as many times as you'd like.
Steps to Print Your Digital Wall Art
1. Determine Your Frame and Print Size
Start by deciding the frame size for your wall art. Most frames include the recommended image size to use with a mat and without a mat. This recommended image size is what your print size will be.
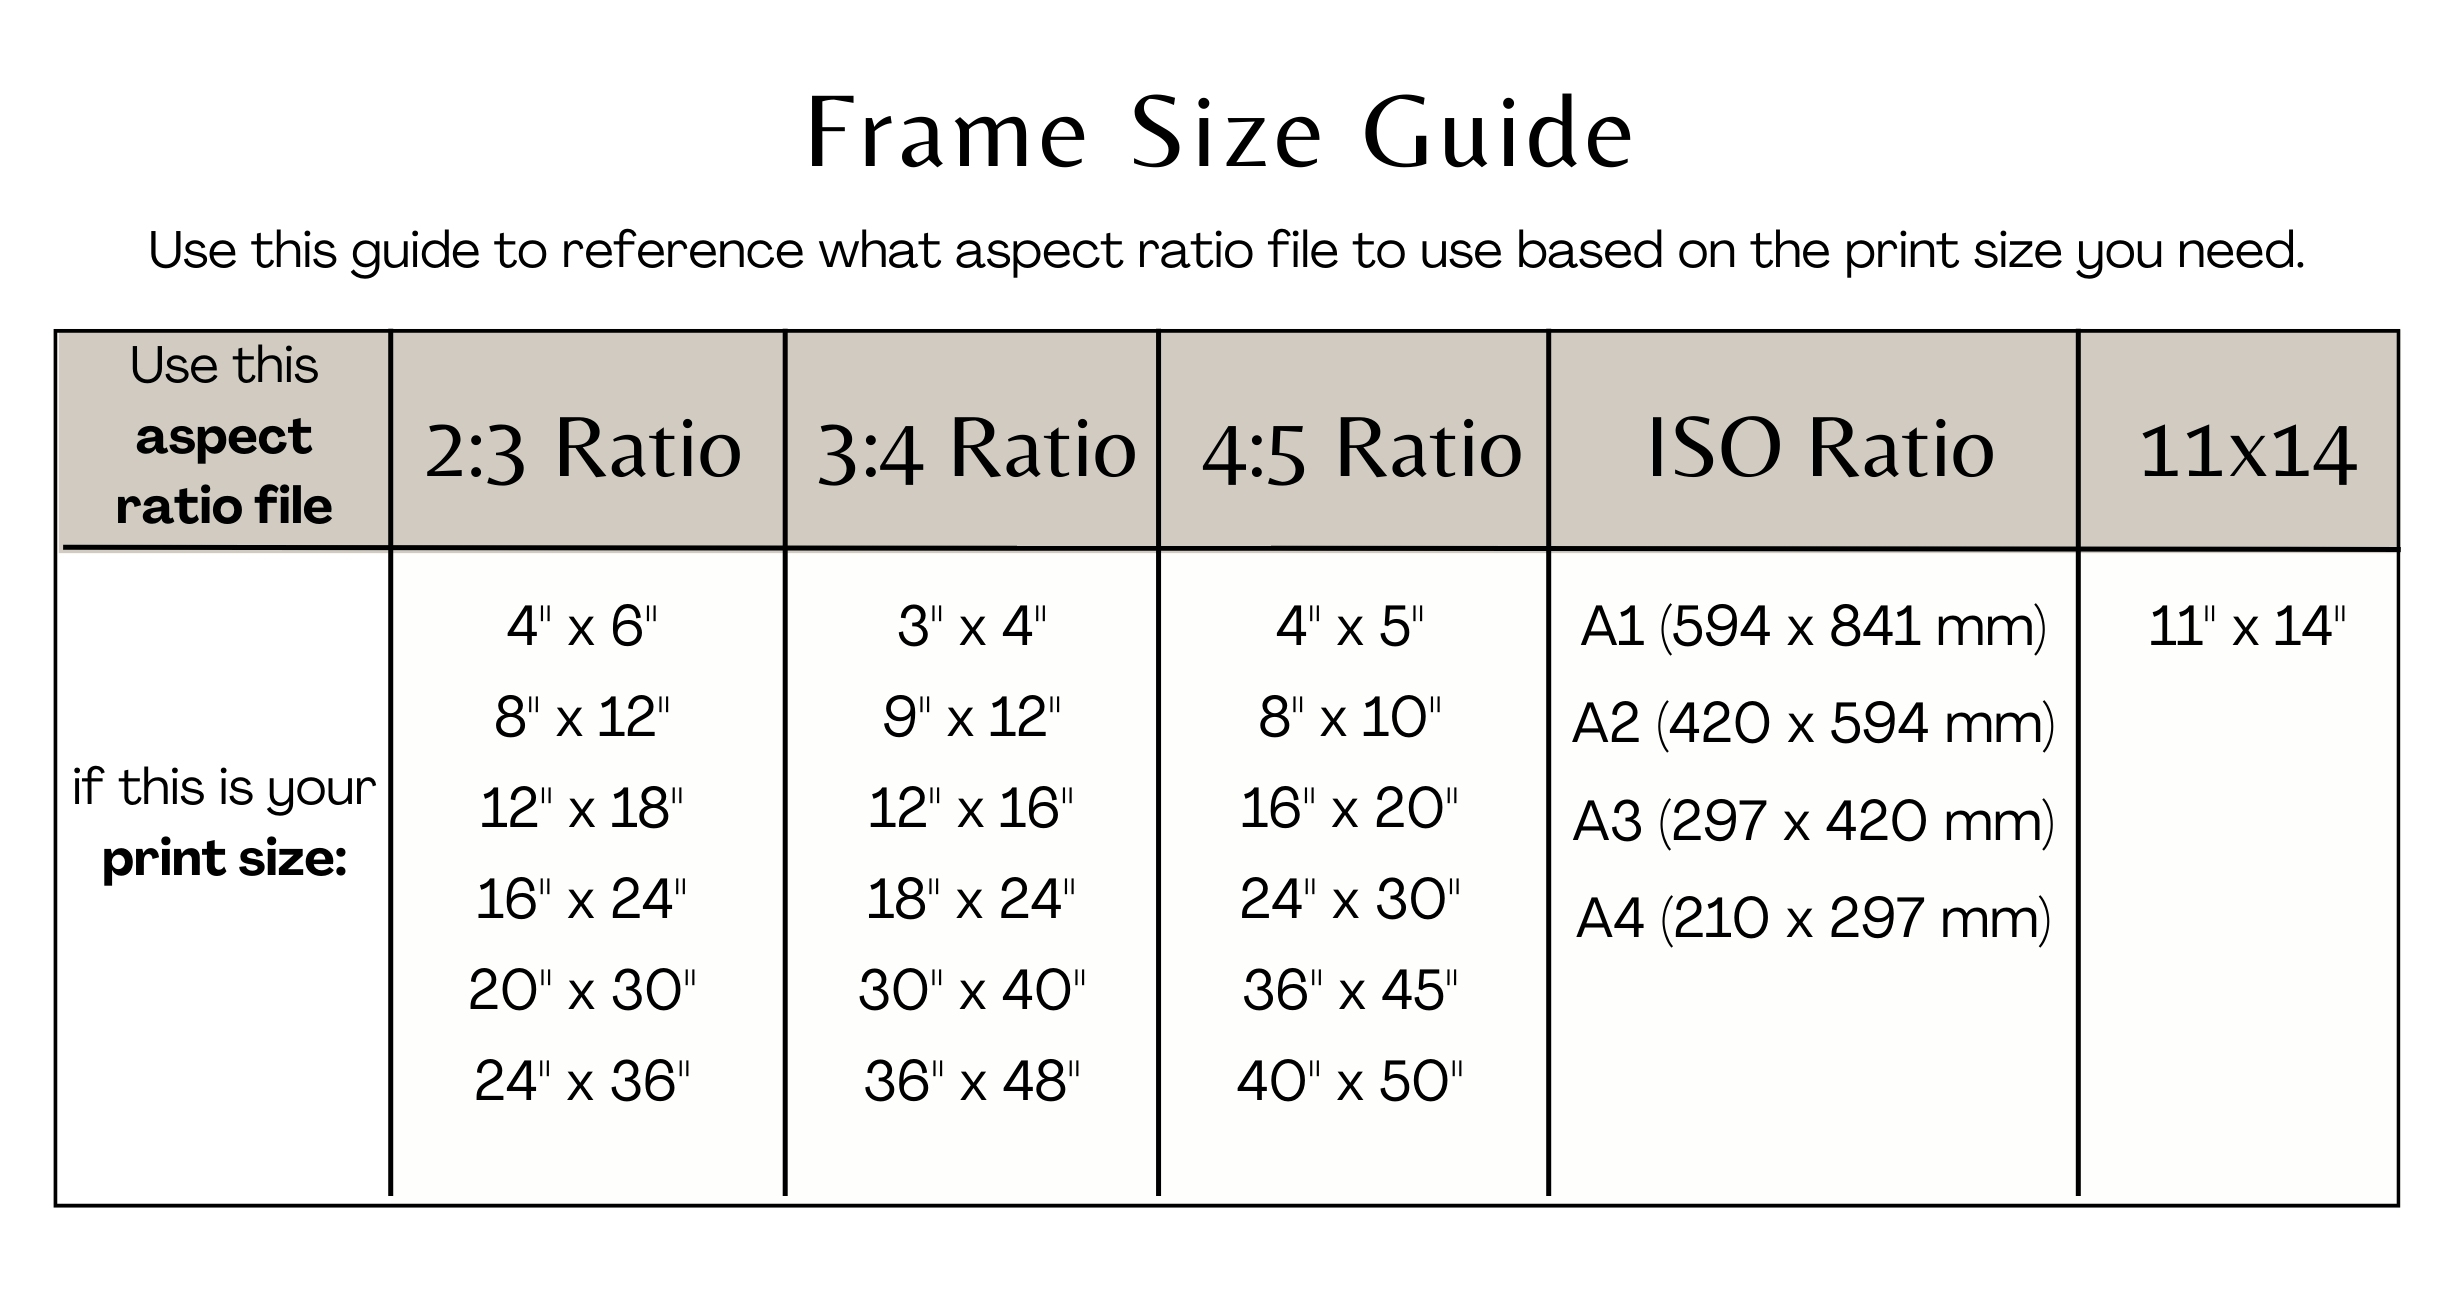
2. Use the Correct Aspect Ratio File
Aspect ratio is the relationship between the width and height of an image. Our prints come in five different aspect ratios: 2:3 ratio, 3:4 ratio, 4:5 ratio, ISO ratio, and 11x14". Refer to the guide below to determine which file to use based on the desired print size. For example, a 16x20" print will need the 4:5 aspect ratio file.
3. Choose the Right Paper Type
The right paper can make all the difference in how your prints appear. Consider the texture, weight, and finish that complements your artwork and room ambiance. Use matte paper if you plan to frame your print, as it reduces glare and doesn't reflect any light from behind the glass. Choose cardstock or heavyweight matte photo paper since heavier paper gives a more refined appearance.
4. Decide Where to Print Digital Art
Choose where you want to print your digital art. If your prints are larger than 11x17", use a print shop, since most home printers can't handle larger sizes. Smaller prints can be printed at home.
If printing at home: Adjust printer settings for sharp details and vibrant colors.
- Set your paper size and type.
- Color Mode: Set the color mode to RGB. Disable the printer's color correction settings before printing.
- Scaling: Check scaling options and make sure they are set to "Actual Size" or "100%" instead of “Fit to Page” to avoid unintentional resizing.
- Print Preview: Make sure the image is positioned correctly on the page and the aspect ratio is maintained.
- Test Print: Before the final print, conduct a test print on regular paper to check colors, contrast, and overall appearance. Make adjustments as needed to meet your expectations.
If printing at a print shop (Walgreens, Office Max, Shutterfly, etc):
- Select the print size and upload the corresponding aspect ratio file.
- Follow the specific printing guidelines for that shop.
In a few simple steps, you've turned a digital artwork into a physical masterpiece! Sometimes, however, you may encounter some problems when printing. Here are some common issues with solutions to ensure your printing process is smooth.
Troubleshooting Common Printing Issues:
- Low Resolution or Blurriness:
- Solution: Check the resolution and size of your digital file. Make sure it is the original downloaded file and not a screenshot. Also confirm that you used the correct aspect ratio for the print size. Using a different ratio can result in pixelation and blurry prints.
- Color Discrepancies:
- Solution: Ensure your file is in the correct color mode (RGB). Adjust color settings on your computer to match the desired outcome.
- White Borders on Prints:
- Solution: If unintended white borders appear, adjust the print settings to match the paper size (remove borders, zero margins, etc). Manually trim prints if necessary, especially for prints smaller than the page size.
By addressing these common issues, you can increase the chances of having high-quality prints for your digital wall art. If you have any questions or issues regarding prints purchased here, please feel free to contact us for assistance.


